Amazon Cognito User Authentication with Auth0 as OIDC provider
 |
|---|
| source: https://docs.aws.amazon.com/cognito/latest/developerguide/cognito-user-identity-pools.html |
Background
Sign-ups and sign-ins are fundamental functionalities found in virtually every modern application. Amazon Cognito is a robust CIAM (Customer IAM) service designed to provide a scalable identity store. With Cognito, Users can sign in through different authentication methods, such as native accounts within Amazon Cognito or social login, such as Facebook, Google, or Amazon. It supports various compliance regulations and integrates with frontend and backend development resources. It allows sign-ins through a third-party federation, including OIDC providers such as Auth0. In this article, we’ll delve into setting up Auth0 as an identity provider for AWS Cognito and some essential concepts along the way.
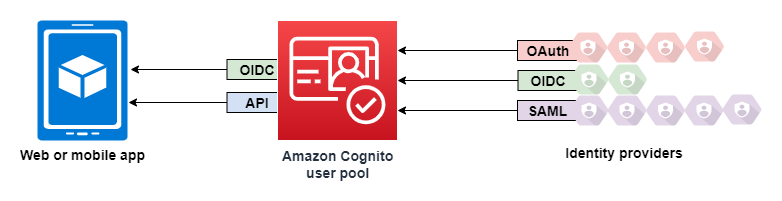
An identity provider (IdP) is a trusted entity that authenticates and vouches for the identity of a user. It plays a crucial role in user authentication and identity verification. In the context of Cognito, an AWS Cognito user pool is an OpenID Connect (OIDC) identity provider (IdP). It allows verification with an external identity provider.
Prerequisite
Before proceeding, ensure you have registered your application with Auth0. If you haven’t done so already, refer to the following for guidance:
Amazon Cognito User Pool
Amazon Cognito serves as both a user directory and an OAuth 2.0 identity provider (IdP), facilitating centralized user data storage and management. When you connect Cognito to social, SAML, or OIDC IdPs, your user pool acts as a bridge between service providers and your app. Amazon Cognito becomes a service provider (SP) in this scenario.
Your IdPs pass an OIDC ID token or a SAML assertion to Amazon Cognito. Amazon Cognito reads the claims about your user in the token or assertion and maps those claims to a new user profile within your user pool directory.
Amazon Cognito then creates a user profile for your federated user in its own directory. Amazon Cognito adds attributes to your user based on the claims from your IdP and, in the case of OIDC and social identity providers, an IdP-operated public userinfo endpoint.
Once a profile for your federated user is created within Amazon Cognito’s directory, it assumes the role of the IdP for your application, which now functions as the SP. Amazon Cognito is a combination of OIDC and OAuth 2.0 IdP. It generates access tokens, ID tokens, and refresh tokens.
To configure a user pool for an OIDC identity provider:
- Navigate to the Amazon Cognito console and select Create user pool.
-
In Step 1 Configure sign-in experience, choose Federated identity providers for provider types and OpenID Connect provider out of the federated sign-in options.
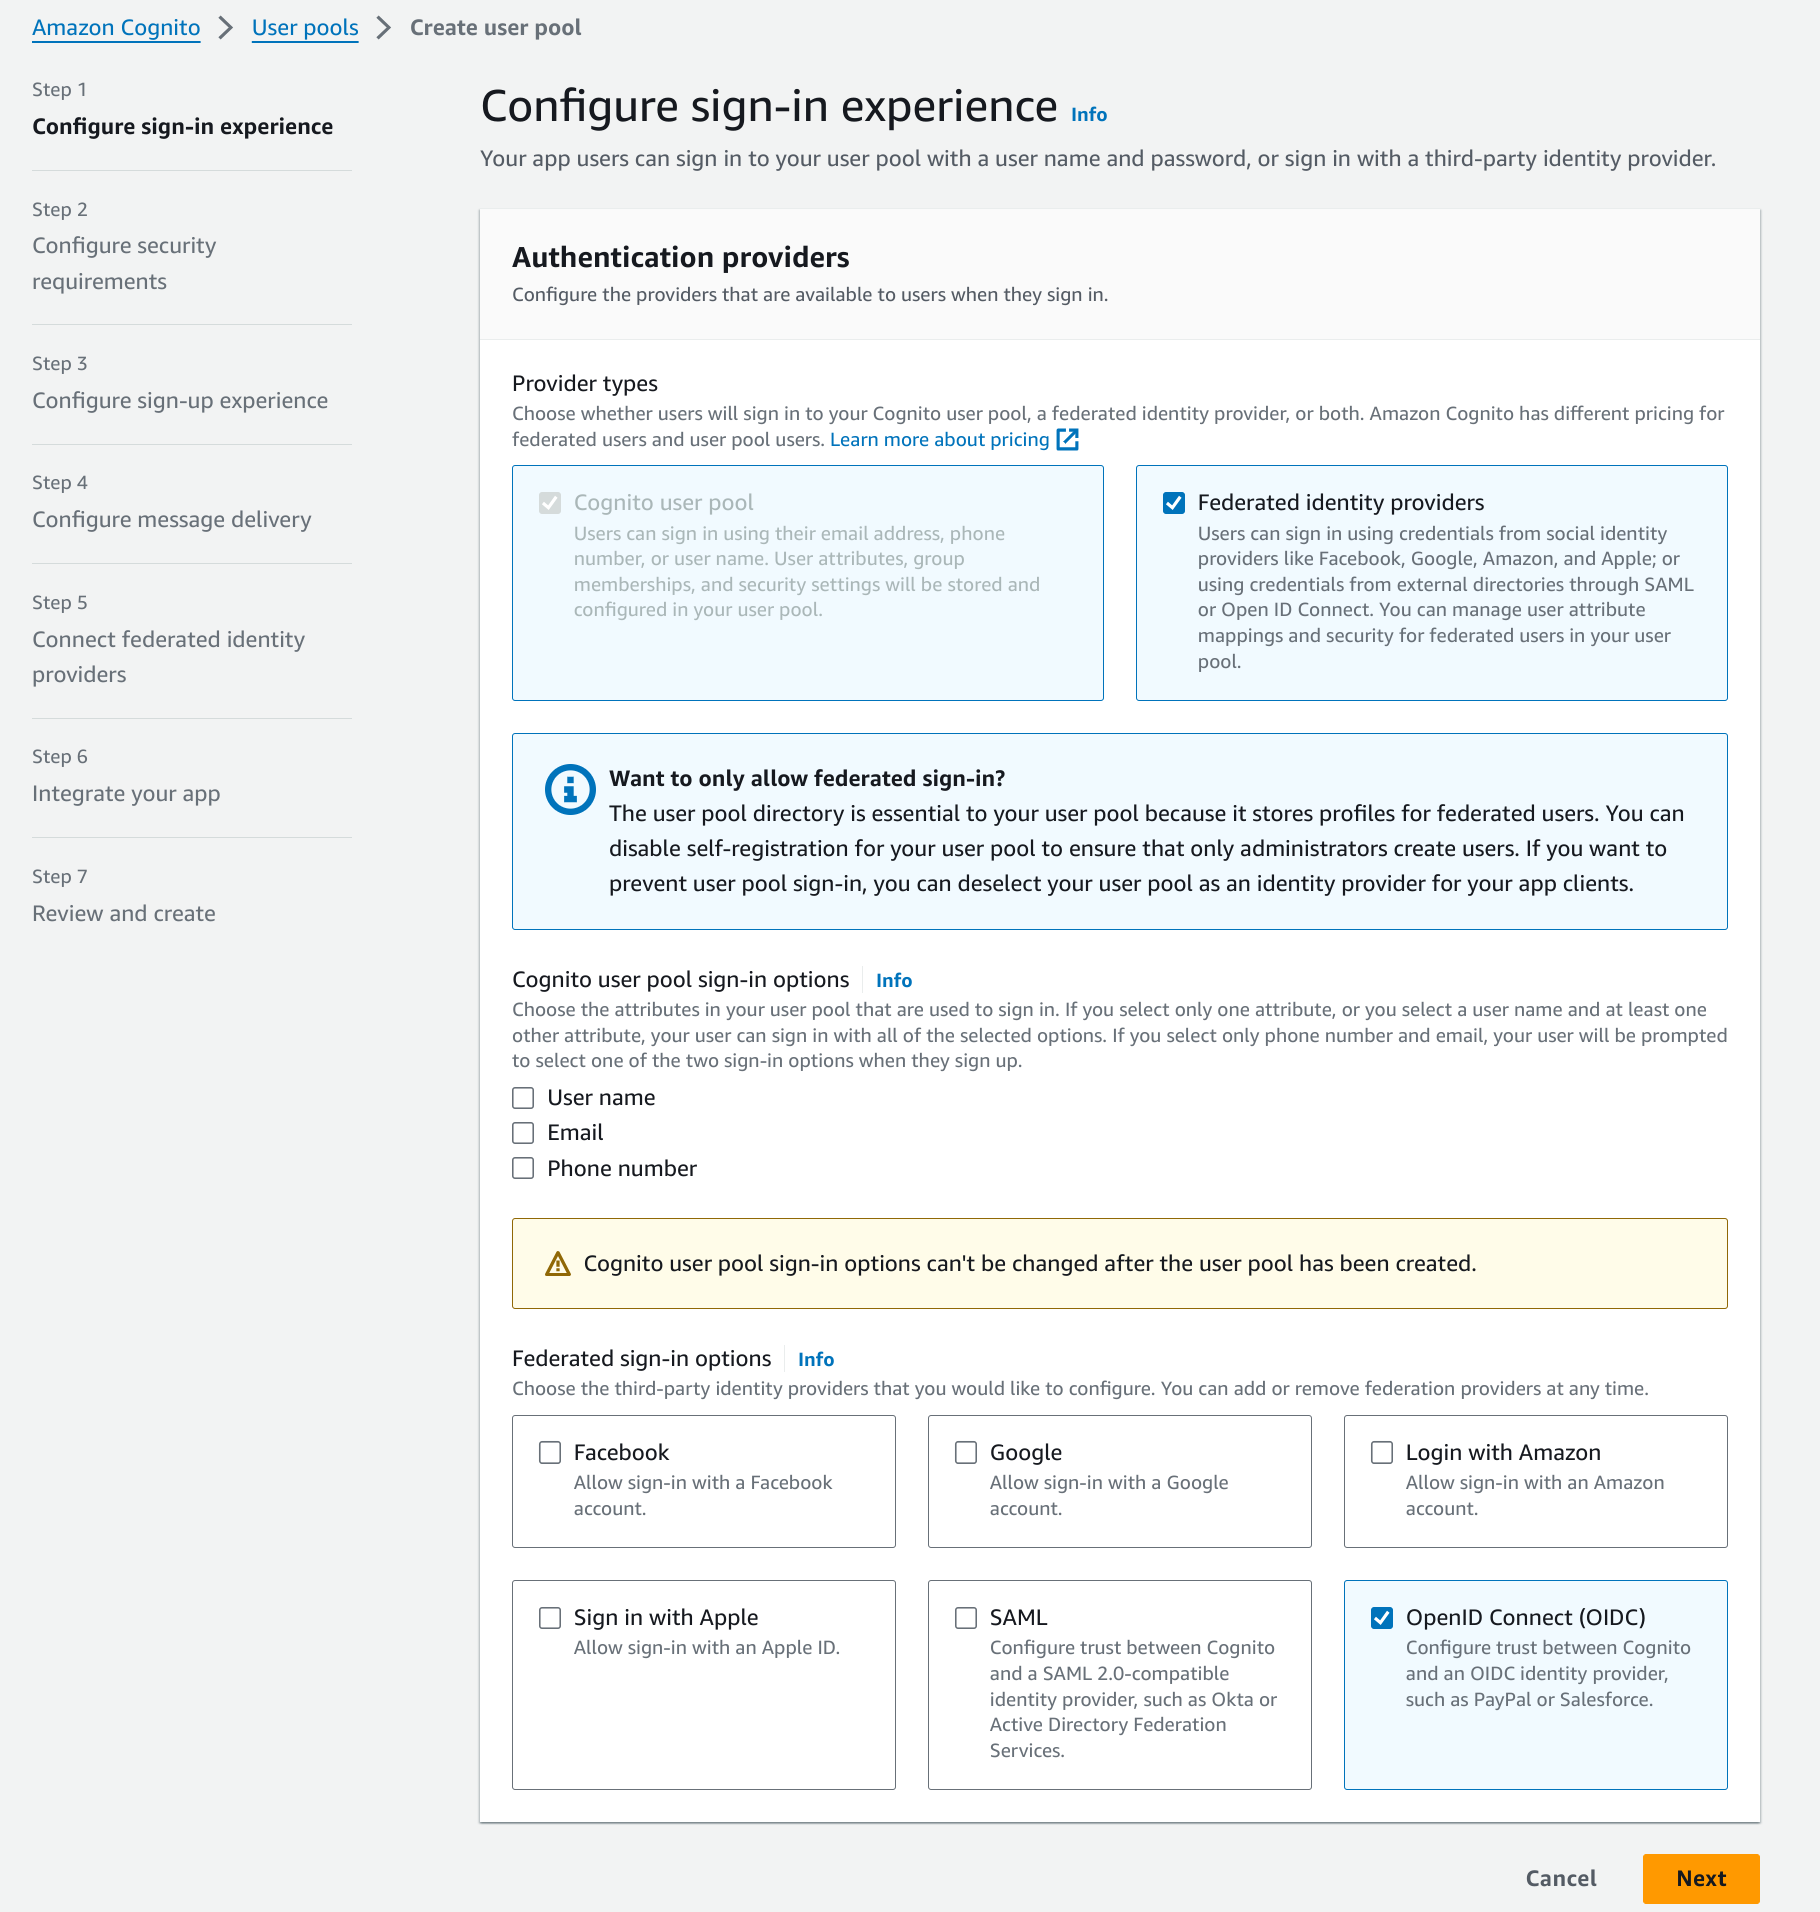
- Configure security requirements, sign-up experience, and message delivery according to your requirements.
-
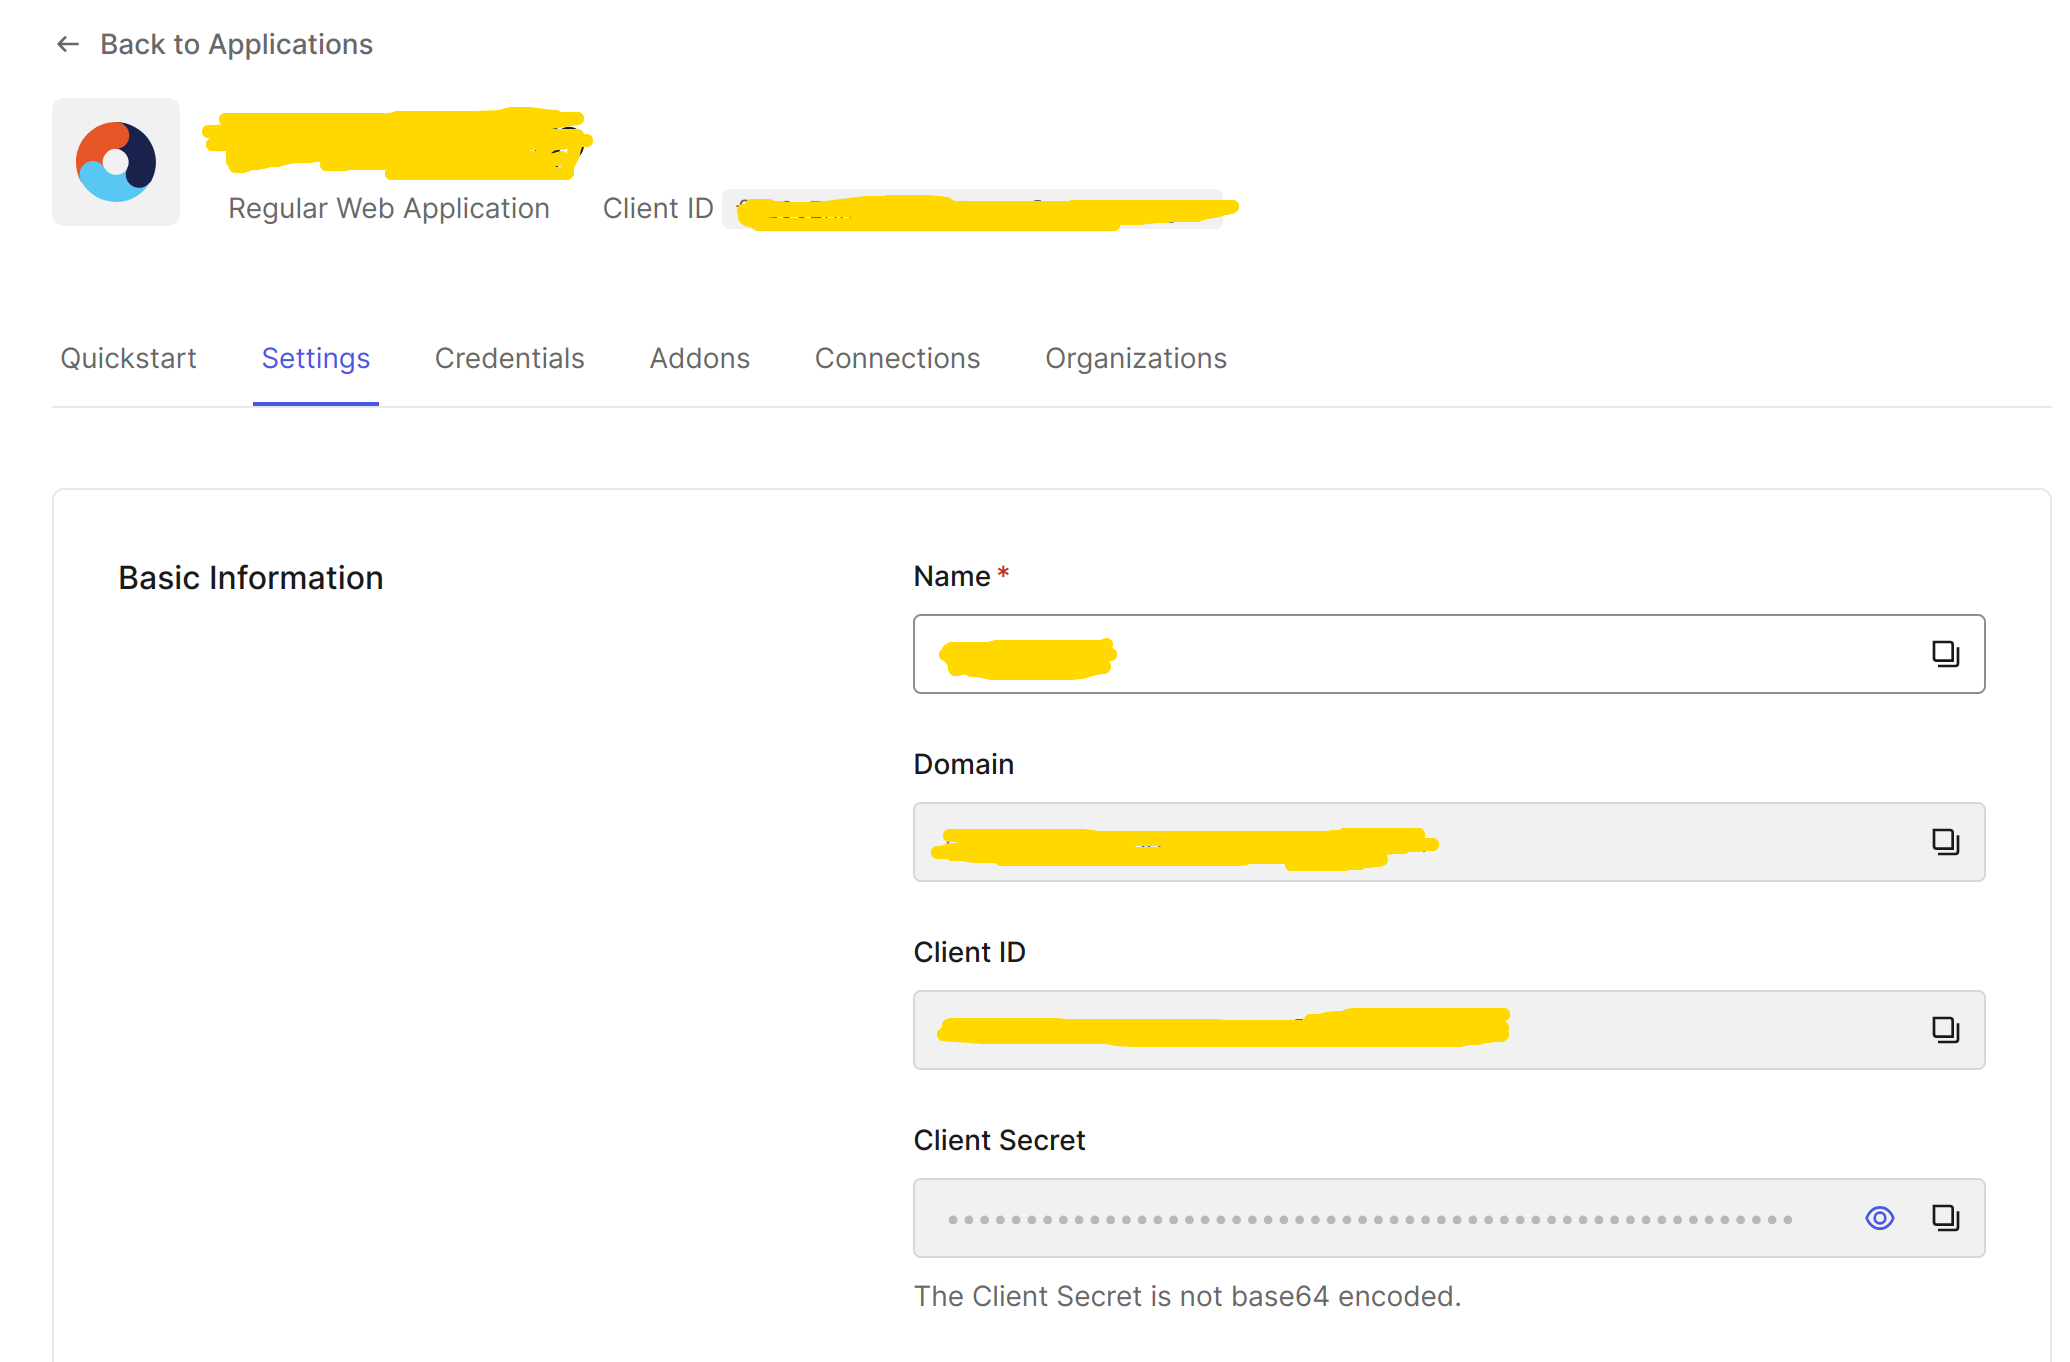
In Step 5, enter the client ID and client secret. In the Auth0 dashboard, go to applications and choose the app of your choice. Retrieve your client ID and client secret in the settings page. Set the attributes request method to POST. For the issuer URL, enter the value under Domain. Refer to this guide for more information: https://docs.aws.amazon.com/cognito/latest/developerguide/cognito-user-pools-identity-provider.html#cognito-user-pools-oidc-providers
- In Step 6, give your user pool a suitable name. As for the app client section, refer to this: https://docs.aws.amazon.com/cognito/latest/developerguide/user-pool-settings-client-apps.html
- Review the changes and create the user pool.
Creating New OIDC Provider in AWS
Now, create a new IAM OIDC identity provider in AWS. You can easily do this by following this tutorial. Make sure to retrieve your client ID registered with Auth0.
Now that you have an identity provider created in AWS, proceed to associate it with the user pool created earlier.
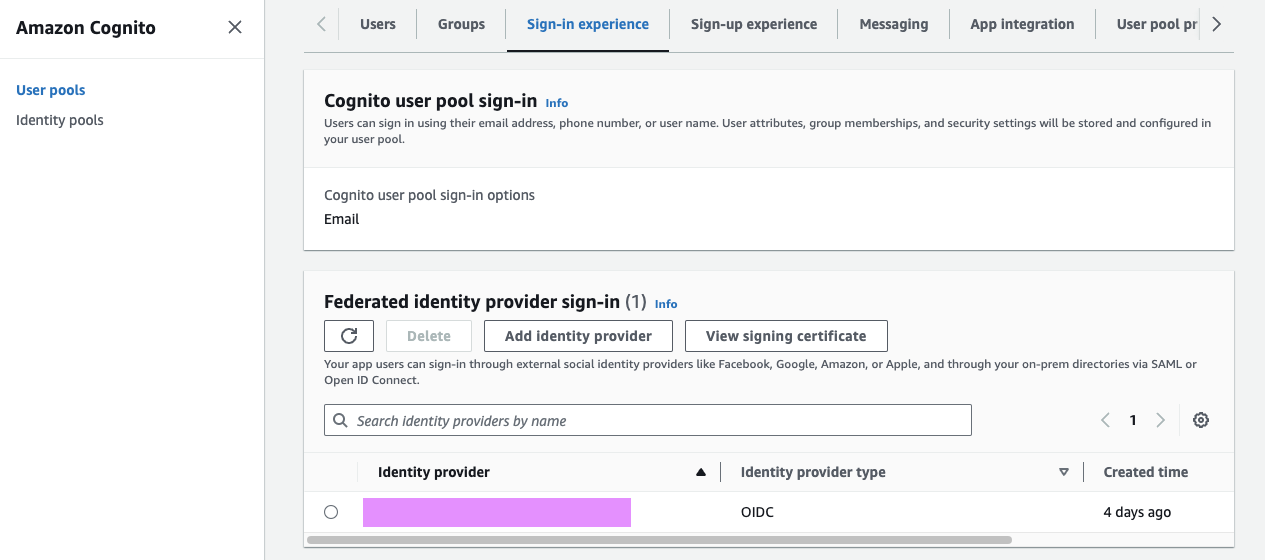
Go to the sign-in experience tab, and under the federated identity provider sign-in, click Add identity provider for your IdP.
Configure Auth0
Return to the Auth0 dashboard and select your application again. Scroll down until you see the Application URIs section.
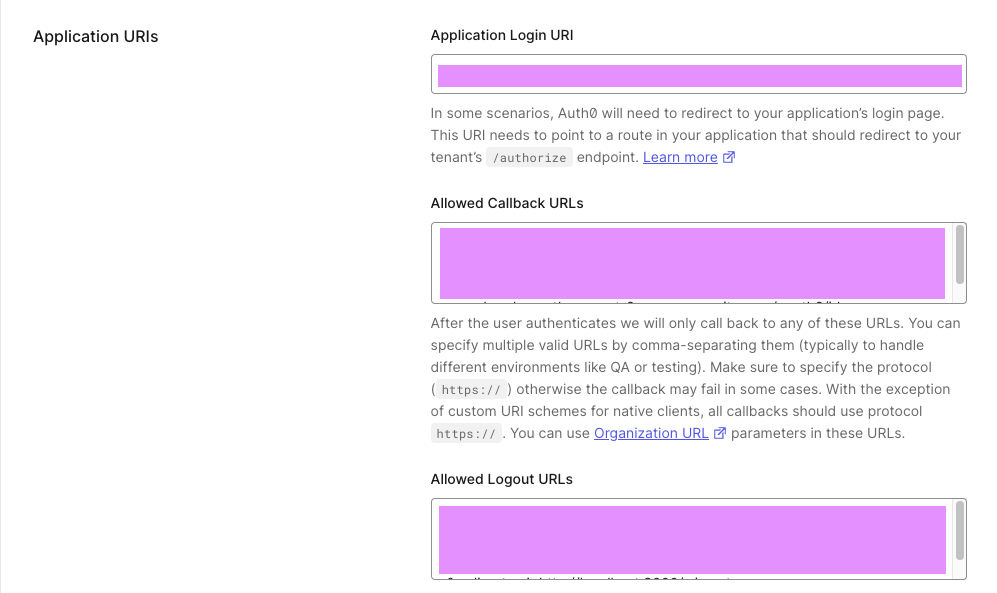
Complete the fields based on the following instructions:
- Allowed Callback URLs:
https://${cognito_domain_url}/oauth2/idpresponse - Application Login URI:
https://${cognito_domain_url}/login?response_type=code&client_id=${user_pool_web_client_id}&redirect_uri=${your_application_url} - Allowed Web Origins: Your application URL, e.g. http://localhost:3000
- Allowed Logout URLs:
https://${cognito_domain_url}/logout?response_type=code&client_id=${user_pool_web_client_id}&redirect_uri=${your_application_url} - Allowed Origins (CORS): Your application URL, e.g. http://localhost:3000
Conclusion
By linking Auth0 with Amazon Cognito, you’ve established a secure way for users to sign up and sign in to your application. This collaboration allows Amazon Cognito to delegate the authentication process to Auth0, leveraging its advanced features.
This integration brings flexibility, scalability, and compliance with regulations to your application. It seamlessly integrates with frontend and backend resources and supports third-party federation through OIDC providers like Auth0.
references:
- https://auth0.com/intro-to-iam/what-is-openid-connect-oidc
- https://docs.aws.amazon.com/cognito/latest/developerguide/cognito-user-pools-identity-federation.html
- https://docs.aws.amazon.com/cognito/latest/developerguide/cognito-user-pools-identity-provider.html#cognito-user-pools-oidc-providers
- https://docs.aws.amazon.com/cognito/latest/developerguide/tutorial-create-user-pool.html
- https://aws.amazon.com/blogs/security/use-the-hosted-ui-or-create-a-custom-ui-in-amazon-cognito/
- https://hyprstack.medium.com/reactjs-aws-cognito-authentication-with-auth0-f3f16094fa8

Leave a comment